

In an attempt to chronicle my journey as a beginner cosplayer, I have taken a page from book of the amazingly talented, beautiful, and awe-inspiring cosplayer, The Geeky Seamstress, and decided to dedicate a post about the making of my latest cosplay project, the character Mercy from Overwatch.


For my first difficult build, I wanted to do a video game character from a fairly recent game. Now usually play Legend of Zelda, Twilight Princess, Okami, the Lego Games and the Batman Arkham Asylum franchise, games that usually play by yourself, an action adventure heroes' journey. I'm scared to death of any FPS, or First Person Shooter in which you play on a stage or map with your friends or random gamers all over the world, like Call of Duty, League of Legends or Overwatch. They just seem way too competitive and advanced for me, hell I have yet to finish Legend of Zelda Skyward Sword, but the character designs are amazing and seem very difficult.
I was determined to make a video game character cosplay build, as a way to teach myself some more skills. I fell in love with Mercy because she seemed fairly tall, one aspect I have to my advantage and also because she is technically in her 30's, which I am as well, and something you rarely see in popular characters.

For this build I followed Youtube tutorials from EvilTed and Punished Props, on how to make armor from foam. With some trial and a whole lot of error, I finally got the hang of it and made my below Mercy build. I also constantly reference cosplayers that had already built Mercy to see how they made the wings or her chest-piece. Cosplayers Chrix Design, Ashley Oshley, Pizoobie, and Tasha of Spiral Cats fame have all made recent Mercy builds. They are all extremely top-level cosplayers but I didn't let that scare me from doing my build.
Time - Approximately 5 weeks. I worked all day some weekends and most nights after work for about 4 hours at a time. I'm definitely not a all-nighter master cosplay builder. I had to take breaks after a few hours, if I did not my work suffered and I made huge errors.
Here's how I made it.
Chest-Piece

I started with the chest-piece built from EVA foam floormats I bought at 5 Below. I tried looking for foam at Home Depot and Loew's and GOT LOST. When I saw them at a discount store I took it as a sign from God to do this Mercy build.
Her chest-piece is tough to figure out. In the awesome, amazing Blizzard reference artwork Mercy's chest-piece is a single uninterrupted piece, molded quite realistically to mimic a bikini model's boobs and torso.
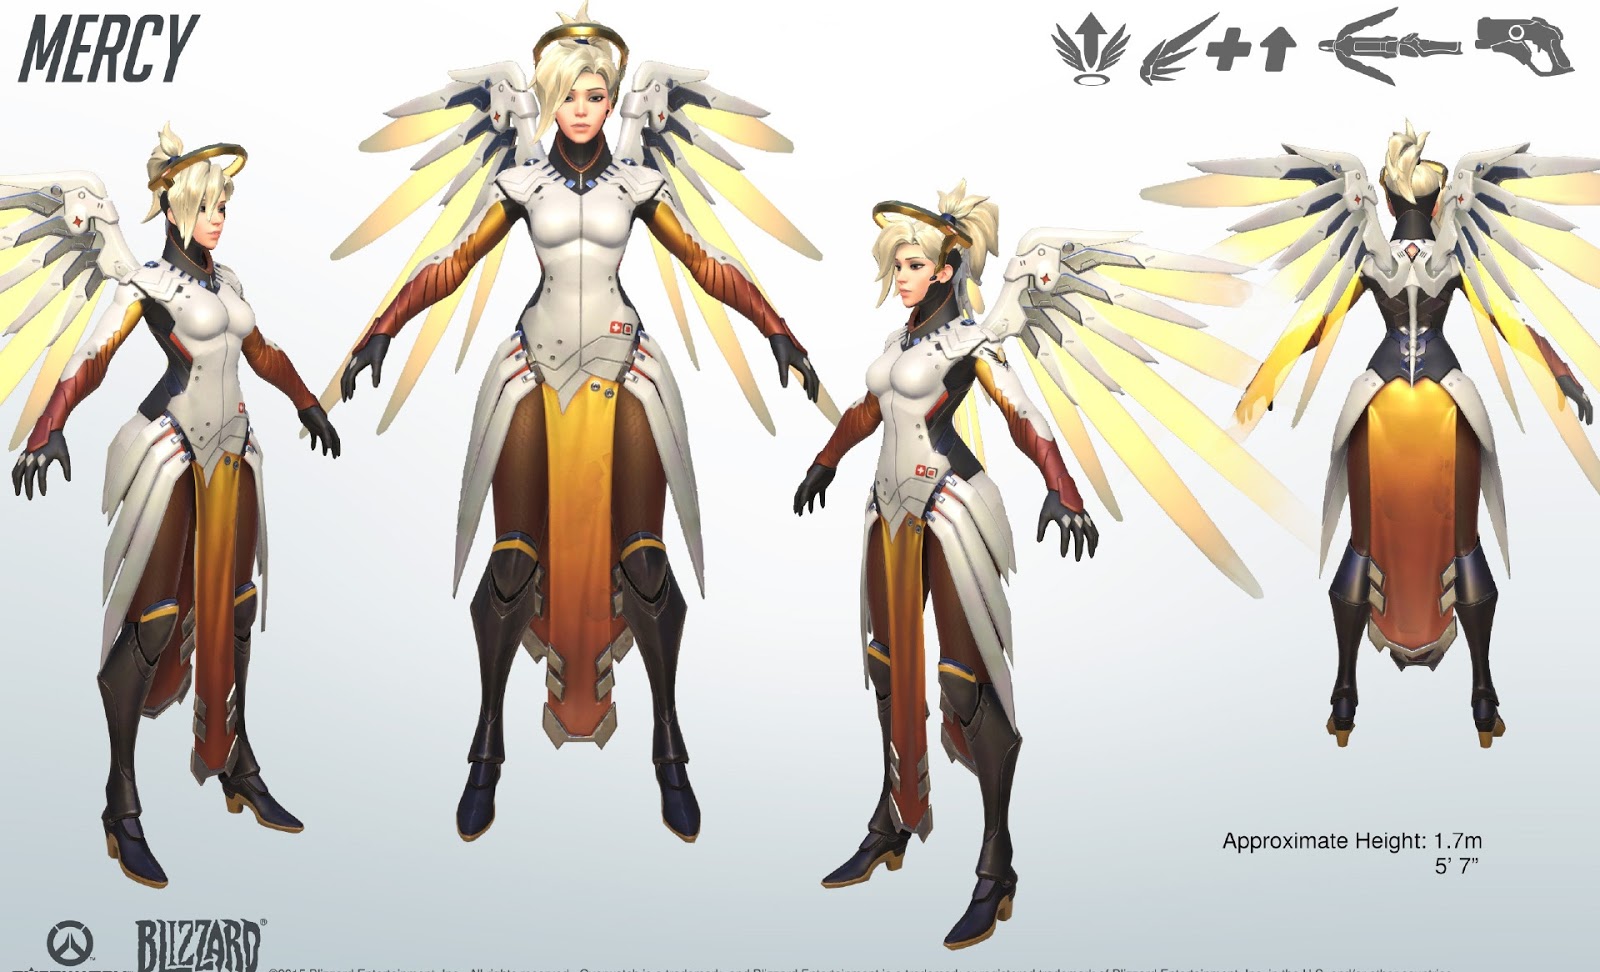
It's like some-one took a naked clothing mannequin and cut off the front. I researched long and hard (that's what he said) to determine how I was going to do recreate this. I went off the EvilTed female armor tutorial and decided to make a chest-piece in three parts, the underbust piece, the boobie cups, and the top piece. I also bought a cheap heat gun and some contact cement.
I followed the tutorial, covering myself in plastic wrap and duct tape to make a pattern, which I then transferred to paper, and traced it onto the flat foam. I later learned that foil and duct tape are a tiny bit easier to use in pattern making rather than plastic wrap.

You heat the foam with heat gun to make curves and use the contact cement to glue in place. I also used liberal amounts of hot glue to secure.


You can do this for her leg guards, and also her halo. To make nice, visible ridges in the foam I followed Punished Props tutorial - The Secret to Creating Perfect Foam Ridges. Remember to keep your blades sharp, with a sharpener you can find at a hardware store, cutting into foam will dull them pretty quick, causing them to make weird tears in your foam.
Once I had a finished armor piece that fit, I used Plastidip that you can get at Walmart in black, white and clear to seal and paint the foam.


Wings
 |
| Photo Cred - Kathy Tran with the Dallas Observer |

The wings I used cut lengths of PVC pipe that I bent slightly in a curved shape. I used hot glue to attach the pipe to a foam pieces cut to look like the wing structure on top. The mechanical feathers, I cut the shapes out of cardboard and sandwiched it between layers of regular craft foam in white and black, the hot glued directly to the PVC pipe.


For the yellow feathers I tried to use really thin plexiglass sheets from Hobby Lobby but I ended up horribly shattering the entire sheet trying to use scissors. I decided to cut apart the plastic packaging on some random items, the clear plastic tube of Christmas ornaments, the clear plastic box holding some curtains, etc. and spray paint them yellow. I attached the wings to the other pieces using bits of velcro. Some sweet cosplayers explained to me later that I CAN use plexiglass but I have to cut into it using an Exacto knife or box blade. The more you know, people. The more you know. :)
 |
| I special ordered her patch, which still hasn't arrived in the mail, so I just used Sharpie to color it in. |
Completed - August 2016
Debuted - AnimeFest 2016
Finished Cosplay Photography - Ryan Pollack Photography

Let me know if you have any other questions or would like a post on how I built my props, Mercy's Caduceus Blaster and Staff!

Work in progress photos my own, unless specifically notated.
0 comments:
Post a Comment